大家好,欢迎来到IT知识分享网。
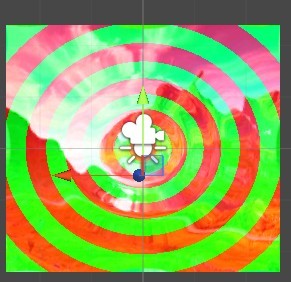
第一次写文章,分享一个 水波 。
刚想做水波效果时不知道怎么实现,不知道就问百度(水波效果),得到 这个:
http://www.baidu.com/link?url=YK9a0-qZUhLC-kdYnp5ZmYHPkM43kPbEaKiiim59dfVj47M3hnFuJCTz6_rAvAvQ&wd=&eqid=ab8397430001762e00000003569494d4
看完之后得到灵感:通过uv偏移 来产生 折射 视觉效果。
我们需要一个圆形的 波浪,确定好园心后,uv 沿半径方向偏移 就可以了,
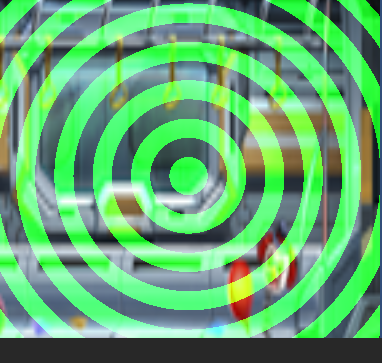
第一步 实现一圈一圈的效果:(使用2作为周期)
fixed4 frag (v2f i) : SV_Target
{
// sample the texture
fixed2 center = fixed2(0.5,0.5);
fixed2 uv = i.uv – center;
fixed rr = length(uv);
fixed xx = rr*20 – _TimeV ;
int dis = floor(xx);
int ss = fmod(dis,2.0);
fixed4 col;
if(ss == 0)
{
col = tex2D(_MainTex, uvn+center);
col += fixed4(0,0.8,0,0);
}
else
{
col = tex2D(_MainTex, i.uv);
}
return col;
}
效果:
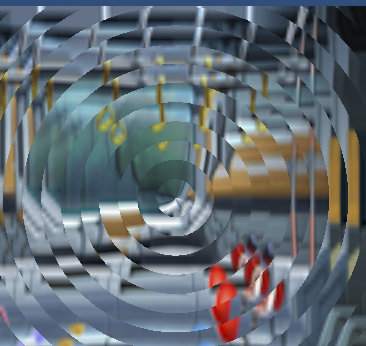
//第2步我们取ss=0的地方进行uv偏移;
fixed4 frag (v2f i) : SV_Target
{
if(ss == 0)
{
//波峰//
fixed sinA = uv.y/rr;
fixed cosA = uv.x/rr;
rr += 0.05;//偏移距离
fixed2 uvn = fixed2(cosA*rr,sinA*rr);
col = tex2D(_MainTex, uvn+center);
//col += fixed4(0,0.8,0,0);
}
else
{
//波谷//
col = tex2D(_MainTex, i.uv);
}
// apply fog
//UNITY_APPLY_FOG(i.fogCoord, col);
return col;
}
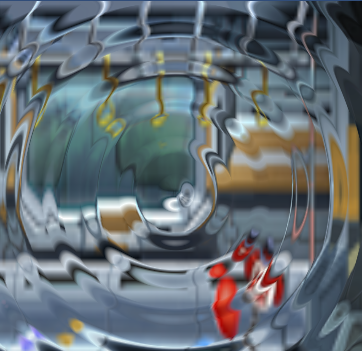
效果:
第3步,给偏移加上渐变效果
if(ss == 0)
{
fixed sinA = uv.y/rr;
fixed cosA = uv.x/rr;
fixed xx0 = xx – dis;
rr += 0.05*sin(3.14159*xx0);
fixed2 uvn = fixed2(cosA*rr,sinA*rr);
col = tex2D(_MainTex, uvn+center);
//col = tex2D(_MainTex, i.uv);
//col += fixed4(0,0.8,0,0);
}
第4步加上 ,波的衰减(里圆心越远,圈的宽度越大)
4.1 添加周期公式:sin(A*x*PI); 周期为At = 2/A
//sin(A*x*PI); 周期为At = 2/A;
fixed rMax = 0.5;
fixed At = 2;//floor(lerp(2,7,rr/rMax));//2为最小周期
fixed A = 1;//lerp(1,2/7,rr/rMax);
fixed ss = fmod(xx,At) – 0.5*At;
fixed sinYy = sin(A*3.14159*ss);
iif(sinYy >= 0)
{
//波峰
col += fixed4(0,0.8,0,0);
}
else
{
//波谷
}
4.2 通过周期的 变长,模拟衰减
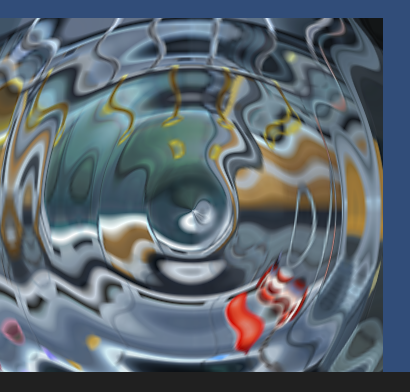
模拟得不成功:先放张目前的效果图,希望有看到的 大牛 提提思路;
fixed4 frag (v2f i) : SV_Target
{
// sample the texture
fixed2 center = fixed2(0.5,0.5);
fixed2 uv = i.uv – center;
fixed rr = length(uv);
fixed rrr = rr*15;
fixed xx = rrr -_TimeV;// fmod(rrr -_TimeV,2);//
fixed sinA = uv.y/rr;
fixed cosA = uv.x/rr;
//sin(A*x*PI); 周期为At = 2/A;
fixed rMax = 0.5;
fixed tMax = 5;
fixed At = 2;//floor(lerp(2,tMax,rr/rMax));//2为最小周期
fixed A = 1;//lerp(1,2/tMax,rr/rMax);//
fixed ss = fmod(xx,At) – 0.5*At;
fixed sinYy = sin(A*3.14159*ss);
fixed4 col;
rr += 0.05*sinYy;
fixed2 uvn = fixed2(cosA,sinA)*rr;
col = tex2D(_MainTex, uvn+center);
return col;
}
//修改波的衰减算法//
圈圈越来越宽,波的周期衰减体现出来了。
完整shader:
Shader “Volume8/vf”
{
Properties
{
_MainTex (“Texture”, 2D) = “white” {}
_TimeV(“TimeV”,float) = 0
_TimeV1(“TimeV1”,float) = 0
}
SubShader
{
Tags { “RenderType”=”Opaque” }
LOD 100
Pass
{
CGPROGRAM
#pragma vertex vert
#pragma fragment frag
//#pragma target 3.0
// make fog work
#pragma multi_compile_fog
#include “UnityCG.cginc”
struct appdata
{
float4 vertex : POSITION;
float2 uv : TEXCOORD0;
};
struct v2f
{
float2 uv : TEXCOORD0;
//UNITY_FOG_COORDS(1)
float4 vertex : SV_POSITION;
};
sampler2D _MainTex;
float4 _MainTex_ST;
float _TimeV;
float _TimeV1;
v2f vert (appdata v)
{
v2f o;
o.vertex = mul(UNITY_MATRIX_MVP, v.vertex);
o.uv = TRANSFORM_TEX(v.uv, _MainTex);
//UNITY_TRANSFER_FOG(o,o.vertex);
//#if UNITY_UV_STARTS_AT_TOP
// float texcoord_y=1-i.texcoord.y;
//#else
// float texcoord_y=i.texcoord.y;
//#endif
o.uv.y = 1 – o.uv.y;
return o;
}
fixed4 frag (v2f i) : SV_Target
{
// sample the texture
fixed2 center = fixed2(0.5,0.5);
fixed2 uv = i.uv – center;
fixed rMax = length(0 – center);
fixed tMax = 5;
fixed rr = length(uv);
fixed rrr = rr*30*(1- 0.3*rr/rMax);//这儿*(1- 0.3*rr/rMax) 体现出波的周期衰减
fixed xx = rrr -_Time.y;// fmod(rrr -_TimeV,2);//
fixed sinA = uv.y/rr;
fixed cosA = uv.x/rr;
//sin(A*x*PI); 周期为At = 2/A;
fixed At =2;
fixed A = 1;
fixed ss = fmod(xx,At) – 0.5*At;
fixed sinYy = sin(A*3.14159*ss);
fixed4 col;
rr += 0.05*sinYy*(1- 0.9*rr/rMax);//这儿*(1- 0.9*rr/rMax) 体现出波的高度衰减
fixed2 uvn = fixed2(cosA,sinA)*rr;
col = tex2D(_MainTex, uvn+center);
//ss = fmod(dis,2.0);
if(sinYy >= 0)
{
//col += fixed4(0,0.8,0,0);
}
else
{
//col += fixed4(0.8,0.0,0,0);
}
return col;
}
ENDCG
}
}
FallBack “Diffuse”
}
免责声明:本站所有文章内容,图片,视频等均是来源于用户投稿和互联网及文摘转载整编而成,不代表本站观点,不承担相关法律责任。其著作权各归其原作者或其出版社所有。如发现本站有涉嫌抄袭侵权/违法违规的内容,侵犯到您的权益,请在线联系站长,一经查实,本站将立刻删除。 本文来自网络,若有侵权,请联系删除,如若转载,请注明出处:https://yundeesoft.com/16023.html

