大家好,欢迎来到IT知识分享网。
- 1. 概述
- 2. 实现
- 2.1. 三维显示
- 2.2. 二维显示
1. 概述
osgEarth支持.earth格式的文件,里面保存了数字地球相关信息的配置XML,只需要读取这个配置文件,就可以直接得到相应的数字地球相关效果。但实际使用中还是感觉到有些不便,有些效果没办法保存下来,所以很多时候还是使用代码实现比较好。osgEarth最基础的就是显示一个数字地球了。
2. 实现
2.1. 三维显示
具体的实现代码如下:
#include <Windows.h>
#include <iostream>
#include <string>

#include <osgViewer/Viewer>
#include <osgDB/ReadFile>

#include <osgEarth/MapNode>

#include <osgEarthDrivers/gdal/GDALOptions>
#include <osgEarthDrivers/cache_filesystem/FileSystemCache>
#include <osgEarth/ImageLayer>

#include <osgEarthUtil/EarthManipulator>

using namespace std;

int main()
{
	osgEarth::ProfileOptions profileOpts;

	//地图配置:设置缓存目录
	osgEarth::Drivers::FileSystemCacheOptions cacheOpts;
	string cacheDir = "D:/Work/OSGNewBuild/tmp";
	cacheOpts.rootPath() = cacheDir;

	//
	osgEarth::MapOptions mapOpts;
	mapOpts.cache() = cacheOpts;
	mapOpts.profile() = profileOpts;

	//创建地图节点
	osg::ref_ptr<osgEarth::Map> map = new osgEarth::Map(mapOpts);
	osg::ref_ptr<osgEarth::MapNode> mapNode = new osgEarth::MapNode(map);

	osgEarth::Drivers::GDALOptions gdal;
	gdal.url() = "D:/Work/OSGNewBuild/osgearth-2.10.1/data/world.tif";
	osg::ref_ptr<osgEarth::ImageLayer> layer = new osgEarth::ImageLayer("BlueMarble", gdal);
	map->addLayer(layer);

	osgViewer::Viewer viewer;
	viewer.setSceneData(mapNode);

	osg::ref_ptr< osgEarth::Util::EarthManipulator> mainManipulator = new osgEarth::Util::EarthManipulator;
	viewer.setCameraManipulator(mainManipulator);

	viewer.setUpViewInWindow(100, 100, 800, 600);

	return viewer.run();
}
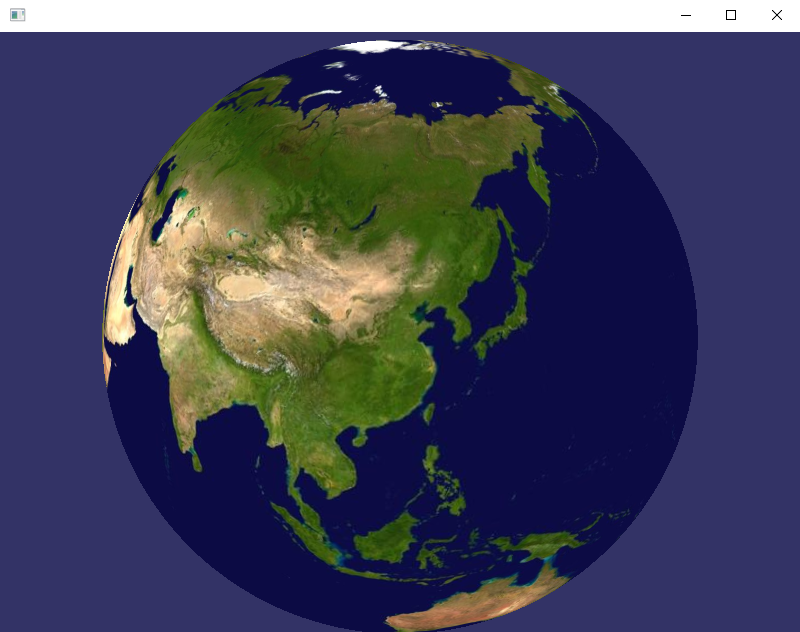
这里有两个点值得注意,其一是使用了缓存机制,可以在浏览的时候变浏览边生成缓存,所以设置了一个缓存目录;其二是加载了一个底图数据,是osgEarth中自带的。运行的效果如下:
2.2. 二维显示
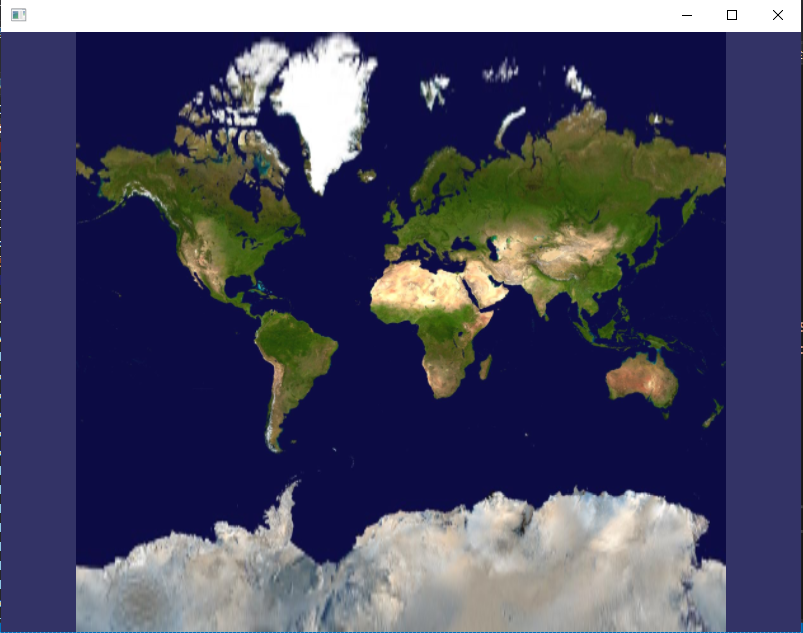
除了显示三维数字地球之外,osgEarth其实还可以显示成平面地图,只需要设置具体的参数就可以了。例如这里显示成web墨卡托投影的二维平面地图:
#include <Windows.h>
#include <iostream>
#include <string>

#include <osgViewer/Viewer>
#include <osgDB/ReadFile>

#include <osgEarth/MapNode>

#include <osgEarthDrivers/gdal/GDALOptions>
#include <osgEarthDrivers/cache_filesystem/FileSystemCache>
#include <osgEarth/ImageLayer>

#include <osgEarthUtil/EarthManipulator>

#include <gdal_priv.h>

using namespace std;

int main()
{
	CPLSetConfigOption("GDAL_DATA", "D:/Work/OSGNewBuild/OpenSceneGraph-3.6.4/3rdParty/x64/gdal-data");

	string wktString = "EPSG:3857";			//web墨卡托投影
	//string wktString = "EPSG:4326";			//wgs84
	osgEarth::ProfileOptions profileOpts;
	profileOpts.srsString() = wktString;

	//osgEarth::Bounds bs(535139, 3365107, 545139, 3375107);
	//osgEarth::Bounds bs(73, 3, 135, 53);
	//profileOpts.bounds() = bs;

	//地图配置:设置缓存目录
	osgEarth::Drivers::FileSystemCacheOptions cacheOpts;
	string cacheDir =  "D:/Work/OSGNewBuild/tmp";
	cacheOpts.rootPath() = cacheDir;

	//
	osgEarth::MapOptions mapOpts;
	mapOpts.cache() = cacheOpts;
	mapOpts.coordSysType() = osgEarth::MapOptions::CSTYPE_PROJECTED;

	mapOpts.profile() = profileOpts;

	//创建地图节点
	osg::ref_ptr<osgEarth::Map> map = new osgEarth::Map(mapOpts);
	osg::ref_ptr<osgEarth::MapNode> mapNode = new osgEarth::MapNode(map);

	osgEarth::Drivers::GDALOptions gdal;
	gdal.url() = "D:/Work/OSGNewBuild/osgearth-2.10.1/data/world.tif";
	osg::ref_ptr<osgEarth::ImageLayer> layer = new osgEarth::ImageLayer("BlueMarble", gdal);
	map->addLayer(layer);

	osgViewer::Viewer viewer;
	viewer.setSceneData(mapNode);

	osg::ref_ptr< osgEarth::Util::EarthManipulator> mainManipulator = new osgEarth::Util::EarthManipulator;
	viewer.setCameraManipulator(mainManipulator);

	viewer.setUpViewInWindow(100, 100, 800, 600);

	return viewer.run();
}
Web墨卡托投影平面坐标系的EPSG代码是3857,所以只需要直接传入相应的代码就行了。对于比较复杂或者自定义的坐标系,其实也可以直接传入wkt字符串,因为osgEarth是通过GDAL来处理空间坐标参考的,GDAL又是通过proj4来处理空间坐标参考的,所以这个时候需要通过GDAL设置一下环境变量GDAL_DATA(具体可以参见《GDAL坐标转换》)。
显示的效果如下所示:
显然,跟Web墨卡托投影的特性一样,椭球被投影成了方形的平面地图。
免责声明:本站所有文章内容,图片,视频等均是来源于用户投稿和互联网及文摘转载整编而成,不代表本站观点,不承担相关法律责任。其著作权各归其原作者或其出版社所有。如发现本站有涉嫌抄袭侵权/违法违规的内容,侵犯到您的权益,请在线联系站长,一经查实,本站将立刻删除。 本文来自网络,若有侵权,请联系删除,如若转载,请注明出处:https://yundeesoft.com/28415.html


